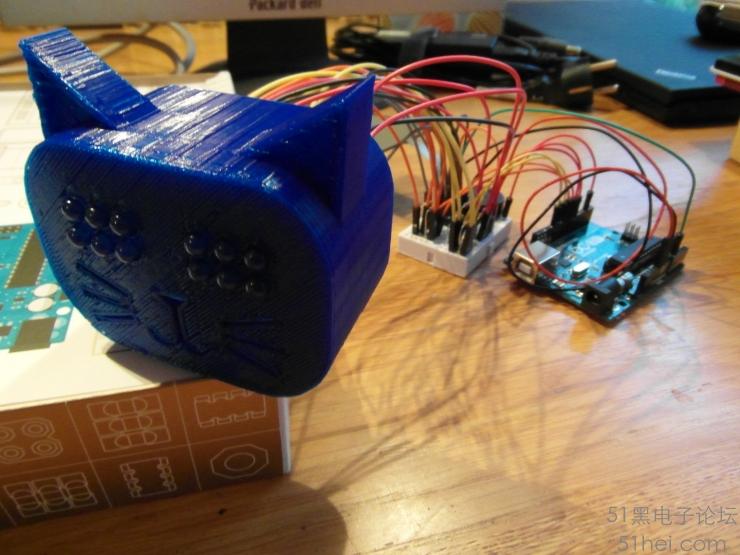
想要养只猫当宠物,但是又担心“猫老爷”的吃喝拉撒睡和掉毛?那就自己做一只机器猫吧!首先让我们从最简单的开始:做一只会随机发出猫叫声的机器猫;另外,它还有一双可以变化的眼睛,当你抚摸它的时候,它还会发出咕噜咕噜的声音。而更重要的是,因为本项目是基于Arduino开发的,你还可以为这只可爱的机器猫设计更多功能!
第一步:准备材料- Arduino UNO
- 面包板
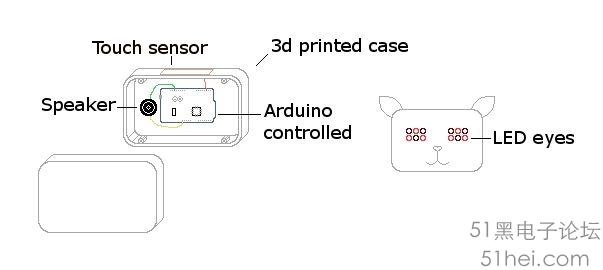
- 喇叭
- 触控传感器(FSR-Interlink 406)
- 12个5mm LED
- 6个220Ω电阻
- 47kΩ电阻
- 15条母对母跳线
- 16条24条母对公跳线
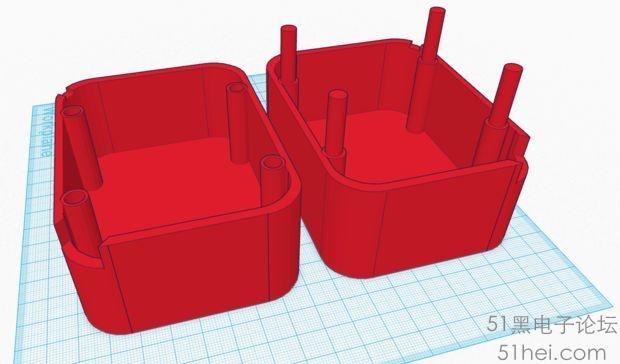
- 3D打印组件若干
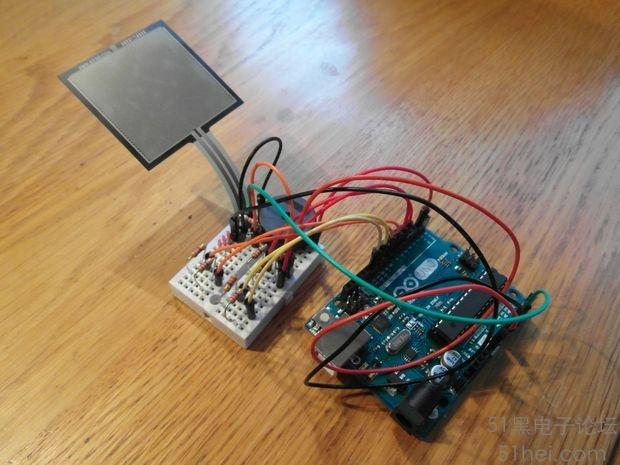
第二步:线路设计首先确定各个输入输出引脚的定义,然后画出电路图。如图所示,除了基本的接地连接外,喇叭连接引脚2,而触控传感器则连接5V和A0,另外,注意在触控传感器上串联一个47kΩ的电阻,这个电阻的阻值大小是可调的,这取决你想要的触控灵敏度。
接下来将LED连接到6、7、8、9、11、12引脚。
第三步:编程确定好连接方式之后就开始编程,基本功能的代码已经写好(点击这里下载
 机器猫.rar
(46.17 KB, 下载次数: 10)
),需要你期望实现更多功能,向其中添加即可。
机器猫.rar
(46.17 KB, 下载次数: 10)
),需要你期望实现更多功能,向其中添加即可。
- //bool LEDIsOn = false;
- //bool LEDsChanged = false;
- bool isBeingPetted = false;
- int sensorValue = 0;
- int totalSensorValue = 0;
- float averageSensorValue;
- int count = 0;
- int randomMeowTime;
- bool defaultEyes [6] = {false, true, true,
- true, true, true};
- bool blinkEyes [6] = {false, false, false,
- true, true, true};
- bool purrEyes [6] = {false, true, false,
- true, false, true};
- bool meowEyes [6] = {true, true, false,
- false, false, true};
- bool mewEyes [6] = {false, true, false,
- false, true, false};
- int ledEyes [6] = {6,7,8,9,11,12};
- void setup() {
- // put your setup code here, to run once:
- // pin 6,7,8,9,11,12 is an LED, pin 2 is the speaker
- for (int i = 0; i <= 5; i++){
- pinMode(ledEyes[i], OUTPUT);
- }
-
- pinMode(2, OUTPUT);
- // pin A0 is the touch sensor input
- pinMode(A0, INPUT);
- changeEyes(defaultEyes);
- }
- void loop() {
- randomSeed(analogRead(0));
- randomMeowTime = random(0.0, 400.0);
- // put your main code here, to run repeatedly:
- sensorValue = analogRead(A0);
- totalSensorValue += sensorValue;
- count += 1;
- if (count == 5){
- averageSensorValue = totalSensorValue / 5;
- if (averageSensorValue > 1005){
- // kat wordt aangeraakt
- isBeingPetted = true;
- //delay(1000);
- } else {
- isBeingPetted = false;
- // kat wordt niet (meer) aangeraakt
- }
-
- if (isBeingPetted == true){
- changeEyes(purrEyes);
- purr();
- } else {
- changeEyes(defaultEyes);
- if (randomMeowTime <= 4){ //randomly meow if not being petted
- changeEyes(meowEyes);
- meow();
- } else if (randomMeowTime == 5){
- changeEyes(meowEyes);
- meow2();
- } else if (randomMeowTime == 6){
- changeEyes(mewEyes);
- mew();
- }
- }
- totalSensorValue = 0;
- count = 0;
- }
-
- delay(1);
- }
- //the sounds the cat makes, the meowing sounds are from here: https://learn.adafruit.com/adafruit-trinket-modded-stuffed-animal/animal-sounds
- void meow() { // cat meow (emphasis ow "me")
- uint16_t i;
- playTone(5100,50); // "m" (short)
- playTone(394,180); // "eee" (long)
- for(i=990; i<1022; i+=2) // vary "ooo" down
- playTone(i,8);
- playTone(5100,40); // "w" (short)
- }
- void meow2() { // cat meow (emphasis on "ow")
- uint16_t i;
- playTone(5100,55); // "m" (short)
- playTone(394,170); // "eee" (long)
- delay(30); // wait a tiny bit
- for(i=330; i<360; i+=2) // vary "ooo" down
- playTone(i,10);
- playTone(5100,40); // "w" (short)
- }
-
- void mew() { // cat mew
- uint16_t i;
- playTone(5100,55); // "m" (short)
- playTone(394,130); // "eee" (long)
- playTone(384,35); // "eee" (up a tiny bit on end)
- playTone(5100,40); // "w" (short)
- }
- void purr() { // cat purr
- uint16_t i;
- uint16_t h;
- for(i=0; i<10; i++){
- playTone(9750,2);
- playTone(9250,2);
- delay(15);//was 6
- }
- for(i=0; i<10; i++){
- playTone(11750,2);
- playTone(11250,2);
- delay(15);
- }
- }
- void playTone(uint16_t tone1, uint16_t duration) {
- if(tone1 < 50 || tone1 > 15000) return; // these do not play on a piezo
- for (long i = 0; i < duration * 1000L; i += tone1 * 2) {
- digitalWrite(2, HIGH);
- delayMicroseconds(tone1);
- digitalWrite(2, LOW);
- delayMicroseconds(tone1);
- }
- }
- //this method changes the eyes.
- void changeEyes(bool eyes[]){
- for (int i = 0; i <= 5; i++){
- if (eyes[i]==true){
- digitalWrite(ledEyes[i], HIGH);
- } else {
- digitalWrite(ledEyes[i], LOW);
- }
- }
- }
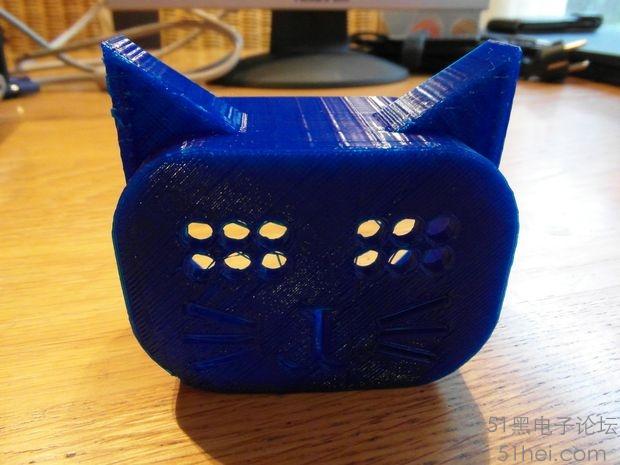
第四步:外形设计创客们在设计一个项目的时候往往会忽视外形方面的设计,但外形设计实际上在创客项目上扮演着极其重要的角色。
而作为一只机器宠物猫,“萌值”的重要性想必是不用再提了。
这是作者的设计,看起来怎么样,如果觉得不顺眼,也可以自己修改或重新设计。
第五步:完成组装因为这个机器猫项目相对比较简单,组装也并不复杂,实际上就是把LED灯放入到猫眼部位就够了。鉴于Arduino的强大性能,实际上这个项目还有巨大的可扩展空间。比如通过和机器小车结合做一个可以运动的机器猫,或者和无人机结合做一只飞行的猫头鹰,甚至还能直接做成猫的形状,套上毛绒玩具就是一只如假包换的机器猫了,当然,做成哆啦A梦的样子也不错。接下来看一下展示吧:
|


 QQ好友和群
 QQ空间
QQ空间 腾讯微博
腾讯微博 腾讯朋友
腾讯朋友 收藏
收藏 淘帖
淘帖 顶
顶 踩
踩


